Angry Bird
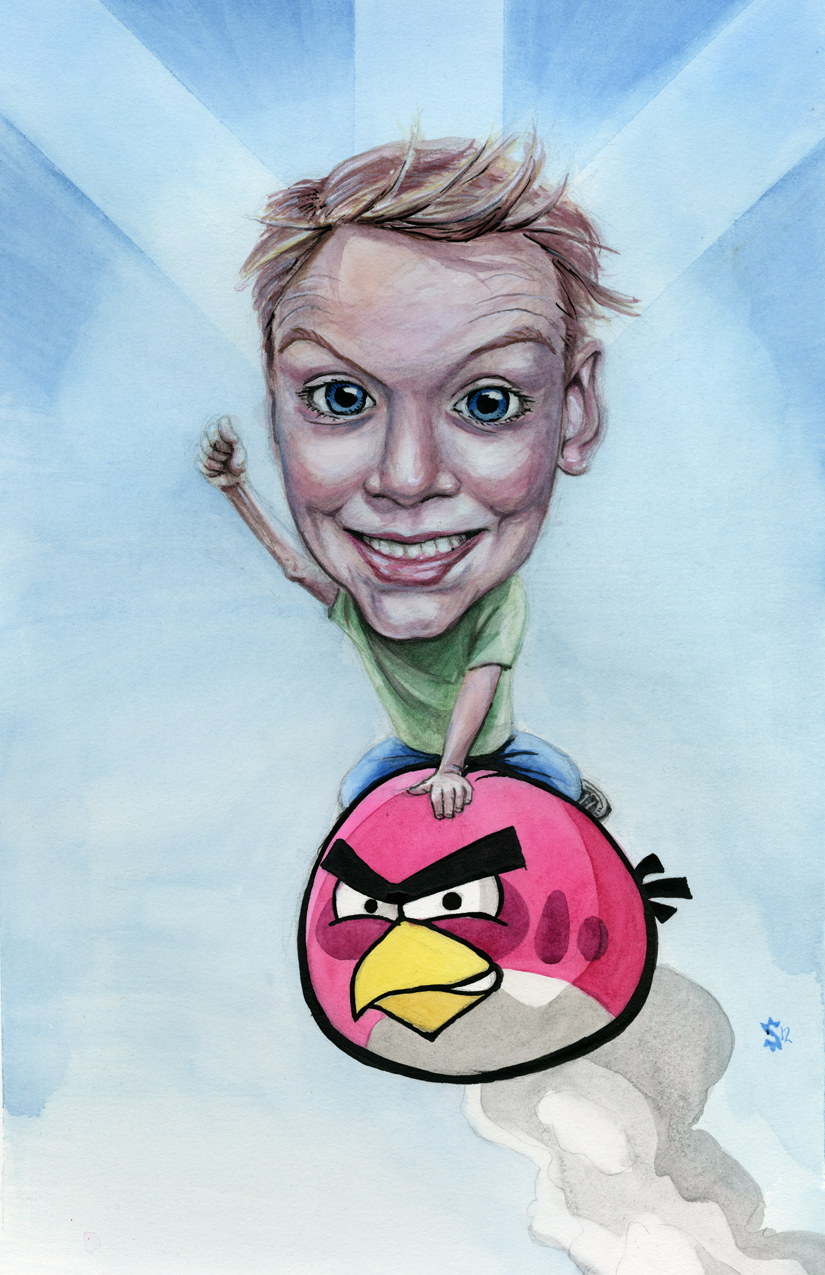
My bossed asked me if I wanted to do a painting for him. Of course I said yes. I mean, I can't pass up an opportunity to at least attempt to show off. Brian, my boss, wanted a picture of his son riding an 'Angry Bird'. This became a chance to try my hand at something new- vector images.
One of the biggest issues of painting something like 'Angry Birds' is the thick black lines that surround every form. With this I have no chance to fudge a line and say that it is because 'the light is hitting it just so…'. No sir, no ma'am I had to try something new.
It just so happens that the very same day I got the call from Brian I had purchased some liner brushes from Sam Flax after seeing Atlanta artist Sam Parker painting in store. As I was walking up to his work space he was outlining a form on the canvas. The newness and brilliance of his technique swept over my artistic sensibilities and nearly on the spot I purchased my new and awesome brushes.
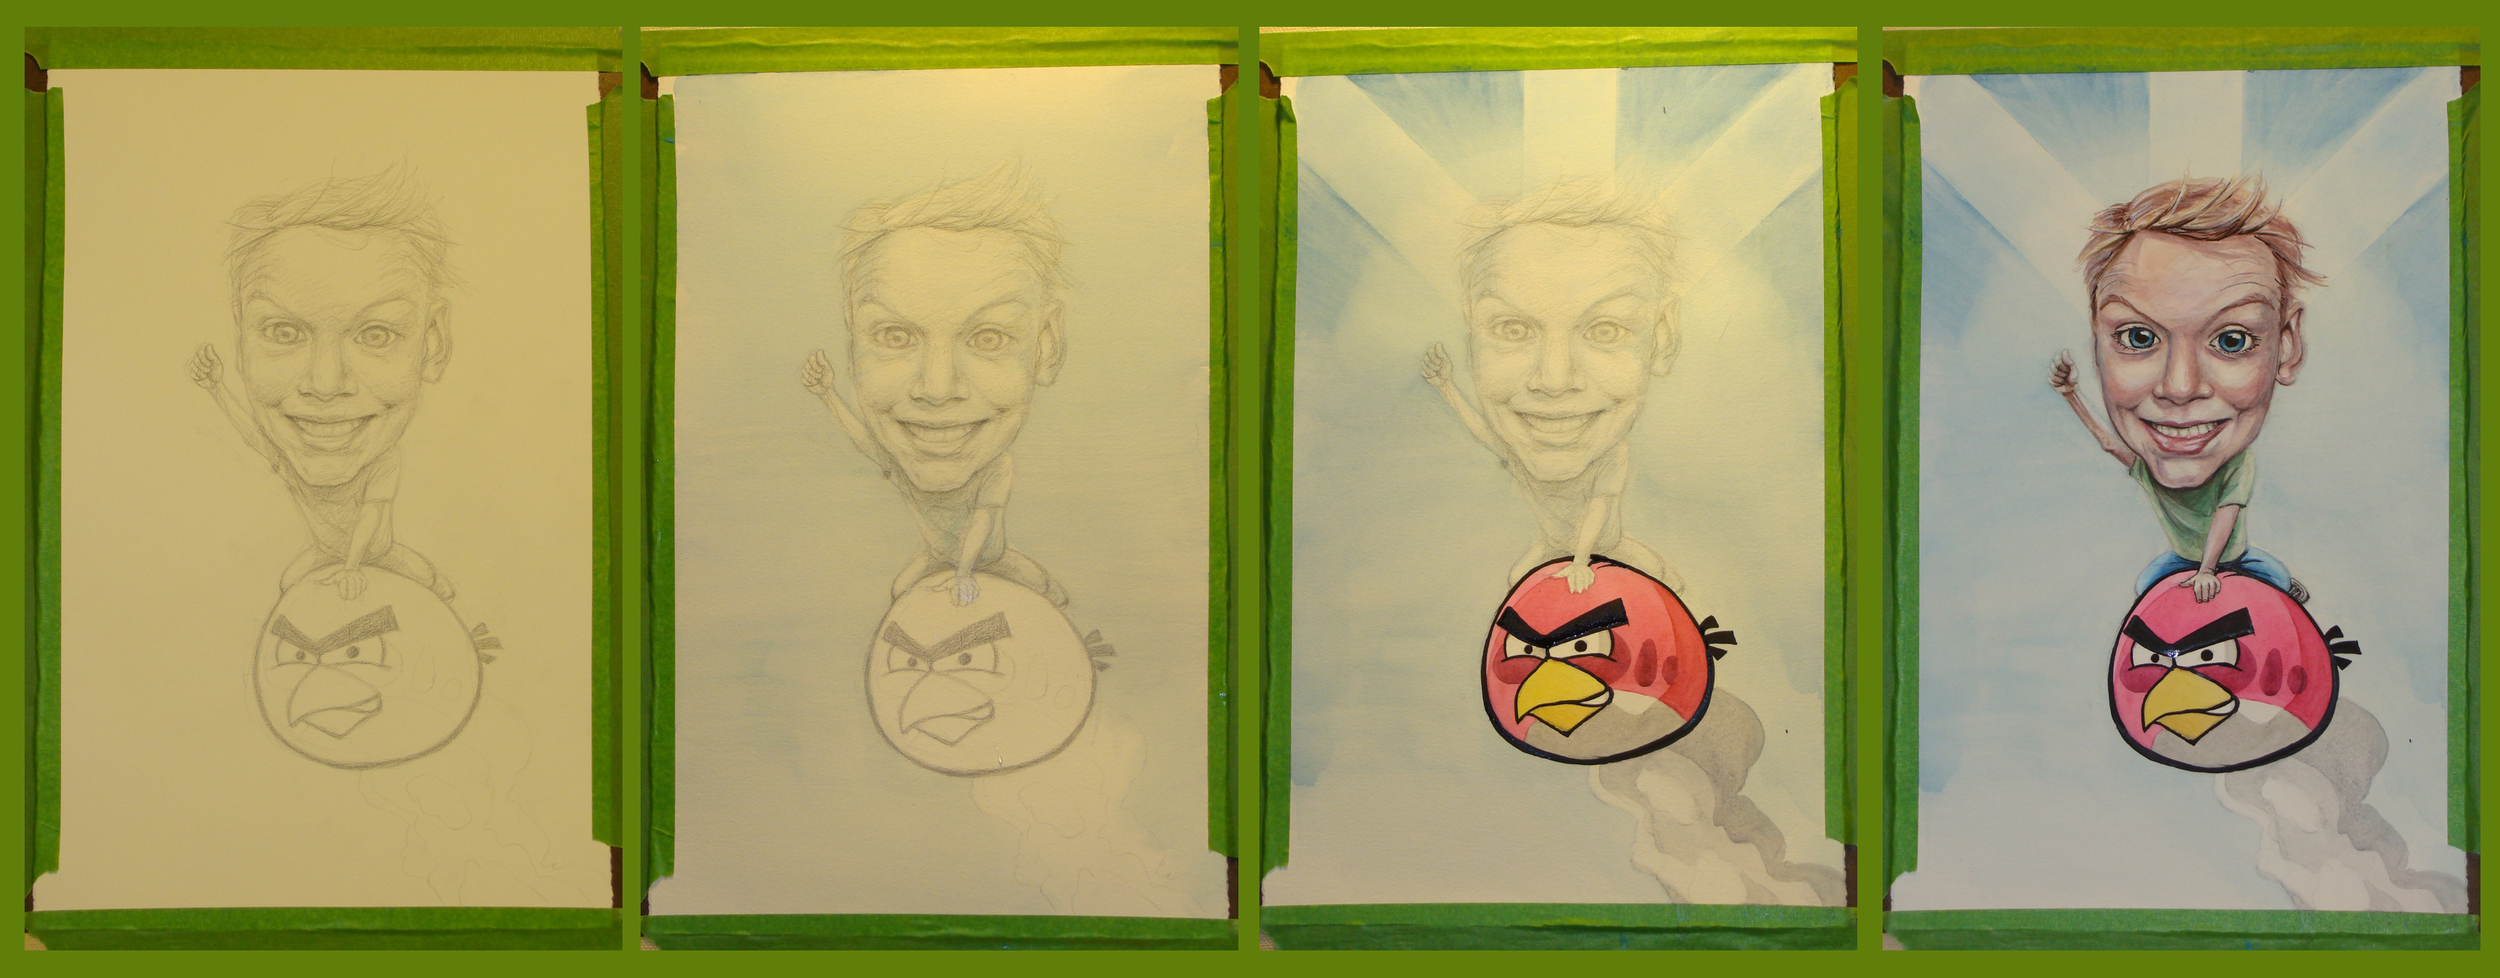
Below is the progression of the painting. It is the four main stages from drawing, to watercolor wash to finished painting.
-When painting in watercolors I almost always will start with a pencil drawing that defines my shapes and general values.
-Next I do a wash over the entire painting then pull out the color from specific highlight areas. Areas such as the nob of the nose, the eyes, the bottom lip and forehead.
-The angry bird is made of 4 layers of color, one on top of the other. For the 'starburst' effect I used frog tape to mask the paper and allow for more freedom in my brushwork.
-Finally I went into the details in the face and we are at the end. Enjoy!

